Showing posts with label How To.... Show all posts

Saturday, June 27, 2009

Tiger and Lily Boutique - Make it! Sell it! Buy it! New Site

On Twitter, I ran across Tiger and Lilly Boutique's craft web site and it looks very interesting! With a selling feature, craft blog, craft forum, and craft projects - what more could you want?

Tiger and Lily Boutique - Make it! Sell it! Buy it!
, is an online arts and crafts resource for handmade gifts. They relaunched their website
to provide a great experience and an easy-to-use craft website that offers new features, such as becoming an Online Vendor or Arts and Crafts Project Writer, $1.00 Banner Advertising, Artist of the Month Spot Light, Resources and Link Exchange program and your very own Craft Closet. For more information or send an email to info@tigerandlilyboutique.com.

Let's keep an eye on Tiger and Lilly Boutique! And, be sure to stop by the Indie CEO Indie Arts Business Blog for ideas for your art or craft business.

As always, I remain...
Truly yours,
Linda
GalleriaLinda

Saturday, February 14, 2009

Scrabble Tile Pendants - Such Fun! Plus, Tutorials!

(Pendant tiles shown above are from the collection at Albu Designs)

Today, I ran across Albu Designs' web site showing wonderful tile pendants. A lot of people make these darling little handmade tile pendants but these cute pendants never get tired. They are great little gifts and always you will find a design that speaks to you.

I was so excited to find that Albu Designs had a great tutorial on how to make tile pendants. Although it is not rocket science, I always wondered about coatings, sizing, and even resources. Albu Designs answers those questions!

Check out Ablu's blog too, where I found another tutorial for making tile pendants: Annie Howe's Keepsakes tutorial on tile pendants.

This is a new thing for me that I want to try....after the polymer clay, wire wrapping, and mixed media art. It is on my LIST!

Enjoy the tutorials and while you are there, browse the diverse and lovely tile pendant designs available by Albu Designs and Annie Howes. And, tell Albu Designs and Annie Howes that GalleriaLinda sent you!

Tuesday, December 23, 2008

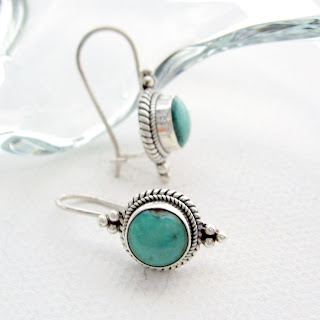
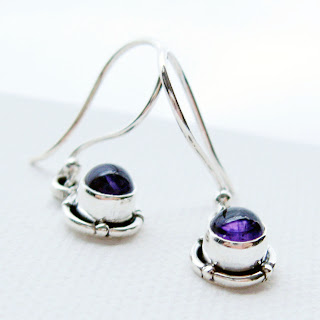
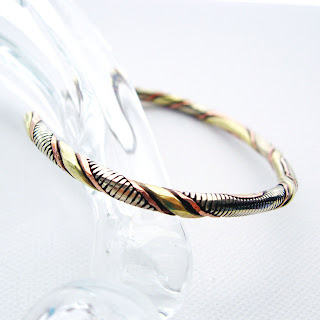
Photographing Jewelry to Capture Customer Affections


When you are trying to engage your customer with an online photo of your product, it can be difficult to capture their fickle affections. It is important to impart a "come-hither" personality to your items! The cliche is true that "one picture is worth a thousand words" when it comes to online shops.

I have thousands of hours invested over the last few years upgrading my jewelry photos. And, I find that I love the photo process as much as creating my handcrafted jewelry line, or creating marketing plans for my other jewelry lines. GalleriaLinda's product photos have improved 10,000% since the first one taken! Through that process I learned some things from the school of hard knocks.

Here are tips that I discovered and will share with you:
  • You can find all kinds of photography tutorials for online businesses and most say to not use a flash, do use natural light when possible, keep the photo simple, take closeups or crop
  • Props are OK but tricky. I have tried it all. Any hint of busyness will make the visitor look elsewhere.
  • I found that antique glassware makes for some awesome backgrounds when you crop closely so you don't identify with the glass object.
  • Natural light is possible by finding a suitable window and placing tracing paper over it to diffuse the light - not with streaming sunshine, though.
  • Using the "natural light through the window" method - don't be surprised if during certain seasons that your photos suffer. The sun is in different positions during the seasons relative to your window location. Find another window!
  • With the natural light issue, your white balance on your camera is your best friend. Take the week you need to read your camera instructions - it is worth it.
  • Product placement, posing, staging, and style is extremely important in creating interest in your photo. Play around with it - try all kinds of scenarios and KISS (keep it SIMPLE silly!)
  • Just when you think that you have tried all setups - try one more. That is usually your "a-ha" moment.
  • What you place your item on is important too. Color? Texture? Translucency? These factors all depend upon these same features in your product. Think of contrasting these elements in your items to your photo staging elements.
I have found that an inexpensive stretched canvass from the art shop makes an excellent base. It provides a very subtle texture and a light lifter.

Book leathers and covers are great textural elements that can be used minimally - not for the entire foundation. Less is more, remember. Sometimes I will place the stretched canvass on top of a book just so the book color and texture peaks out at a corner. Check my photos on the link below and you will see what I mean for a good example of less is more.

To look at some great photos that I have recently taken, check my new shop for GallerialLinda's gemstone and sterling jewelry product line.

Don't forget to sign up for GalleriaLinda's quarterly newsletter of information just like this and for coupons, news, and goodies!

Monday, June 16, 2008

Make it Easy On Yourself! Blog Writer Software-Free!

GalleriaLinda Blog Writing

Do you have the same problem that I do?

Artists and crafty people often don't tend to their marketing strategies because the tasks are time consuming and often frustrating to do (such as using online templates). We as a group just want to create.

I find that writing posts for my blog is often pushed aside and I never "get to it." One of the road blocks is the process of having to go on the Internet to my blog site, sign in, and use the template. The template sometimes goes goofy on me and I have to redo my work, then once posted I have to edit again and again to get it tweaked. It gets frustrating!

Maybe this will help me and perhaps you!! I discovered Windows Live Writer. You can write your posts offline and use it like any other software on your own computer. No glitches and no slow Internet connections. The choice to publish immediately or to schedule your post is very useful.

This is my first post offline and to be published through Windows Live Writer! Tell me how it looks!

Wednesday, November 28, 2007

What NOT to Do with Polymer Clay!

'Nuff said????

Testing the craft oven made me realize that there are hot spots in areas. I just need to "know" my oven's quirks!

Here is what happens with overdone polymer clay.

Saturday, November 17, 2007

Boxed

Has anyone made cute handmade boxes?

You can see a box-making
tutorial here and even a short video here!

I have wanted to try to make them for a while and even saved catalogs and magazines with great covers in heavy paper to use for them.

Yesterday, I receive a rather large Thanksgiving card. There it was on my desk staring at me. As I was defragging my hard drive (kind of like watching paint dry), I noticed the card and thought that it would make a good test box, a tiny test box. I had the time.

Making the box was so easy using the tutorials and the video. I see that magazine cover paper weight woud be best. But, here are some photos of my very first TEST box! I am inspired!

Sunday, June 17, 2007

How to Make Beautiful Earring Cards!

Now that I am addicted to making earrings after I took a wire wrapping class, I have had to figure out new photo elements, as well as how to display and ship the earrings.

I researched the Etsy forums and on Google and came up with this easy and pretty solution! Here is a tutorial. I hope it will help you too!

Items needed for your earring cards:

A. Perforated business card sheets (As an alternate, you could use card stock and cut it yourself on a paper cutter)

B. Color printer (or you can hand color with markers. Just remember your time element for preparation if you do a lot of earrings)

C. Push pin, nail, or other tool for poking a hole.

D. Thick cardboard to use as a protector when you poke the holes.

How to produce your earring cards:

1. Buy perforated business cards on sheets from your office supply store.

I had mine on hand (as a graphic designer, I have TONS of papers of all kinds from over the years and am glad to use some!).

2. Set up your design in your software.

I did not use my graphic programs and used Word quite successfully.

In fact, Word has all the Avery templates for business cards, labels, etc... If you get another brand, usually the box will have the "Avery equivalent" number so you can select the right template in Word.

Here is a
Microsoft tutorial on making a business card in Word. It may help a few of you. If you use a MAC - sorry - can't help!

You can select your software based upon the complexity of your design. You may want to use a graphic program for more control over your design if you need.

3. Figure out a design that is simple.

Remember that your earrings are the focus when they are displayed on the card.

I chose to write my web site URL down the middle and used the same font that is my identify on my banner, web site, and blog. You may want to use a graphic of your own identity or some simple text.

4. Decide what color or colors you want to include.

For my design, I selected five colors that are in my banner and identity graphics, as well as my business cards. Each earring card is a different color so it is not busy and I select the color that will compliment the
earring colors.

5. Complete your design in your software, insert your perforated card sheets into your printer according to your printer's configuration, and print. Then gently fold the perforations so they will come apart easily.
ZestyB had a great tip, "I print dots, like the asterick * or a period on the front of the card so I know where to make the holes."

6. Select the earrings for your first card and select your card for those earrings (if the designs or colors are different like mine).

7. Place the card on the thick cardboard piece. This will be a protector for punching holes.

8. Take your tool (I use a pushpin, but you can use a nail or even a very small punch from the craft store) and punch tiny holes, locating them logically in relation to your design on the card. You can eyeball them rather than measuring them. At least that has been successful for me.

MyFriendsandMeDesign adds that a 1/16" round punch from McGill Punchline works well if you like a little larger hole than a push pin tip. She says, "It has a 2" reach, which is awesome! Now we just need to figure out a way to handle lever-back earrings!"
Her earring cards stand up to show off the earrings. Here's the side view:

On the back flap of the earring cards, she writes what materials were used.

Price tag is always needed, of course and having both the price and materials noted makes craft fairs easier for artist and customers.

The extra touch of the artist's signature is special. (She has always appreciated signatures -- in books, on baskets, on artwork and even puts her initials on cross stitch!)

sohobeads says: "You can use a hole punch to make your holes in the card. I use one that punches stars. To put leverbacks just punch two holes, one under the other, leave some room between the holes and then slip your leverback earring through them."

ZestyB also offers, "Did you know you can purchase plastic hang tags to stick on the back??

9. Thread the earrings into the holes and there you have a beautiful way to display and package your earrings!

Your earrings are made with care and love. Why not display
them as such!


Gemmafactrix
has a great solution for earring cards: "I LOVE my moo cards. I'm currently using them as earring cards. They're a bit more expensive, but I work this into my overall item price. They're definitely worth it.!"

Here is a photo of how Gemmafactrix uses the moo cards for earring cards.